How to Import Financial Data into the MAUS Hub from Excel as a Consultant
1. Login to the app.maus.com, and access the client in question (in my example I will be using “Violet’s Nugget Emporium.")
Note: It is very important that you access the correct client each time, as the later steps will not work should you change clients half way through the process, due to the excel export being locked to the client it was exported from.

2. Once inside the client account, you can click on your name in the top right, which will expand your options menu. You will be looking to click on “Import Accounting data” from this menu.
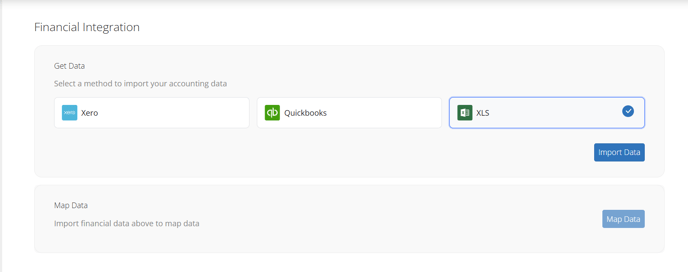
3. From here you will be delivered to the “Import Accounting Data” Screen, and will have to change the “Source” from “Xero” to “Excel":

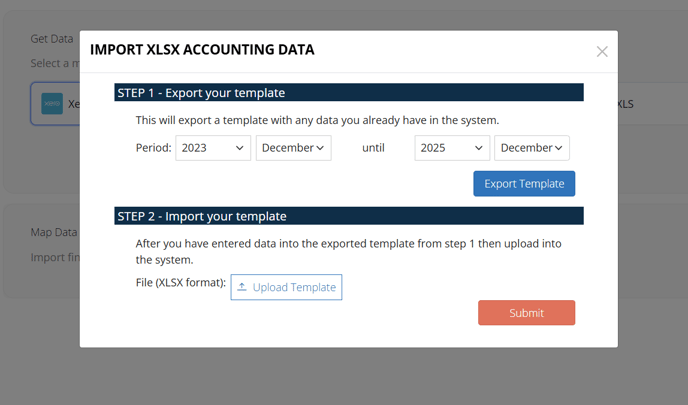
4. After making this change and selecting "Import Data" the system will present you with a 2 step process. Following step 1, you will want to export the existing data. Once the “Export Data” prompt is accessed, you will be prompted to select your date range and then press “Submit” to export the excel file.

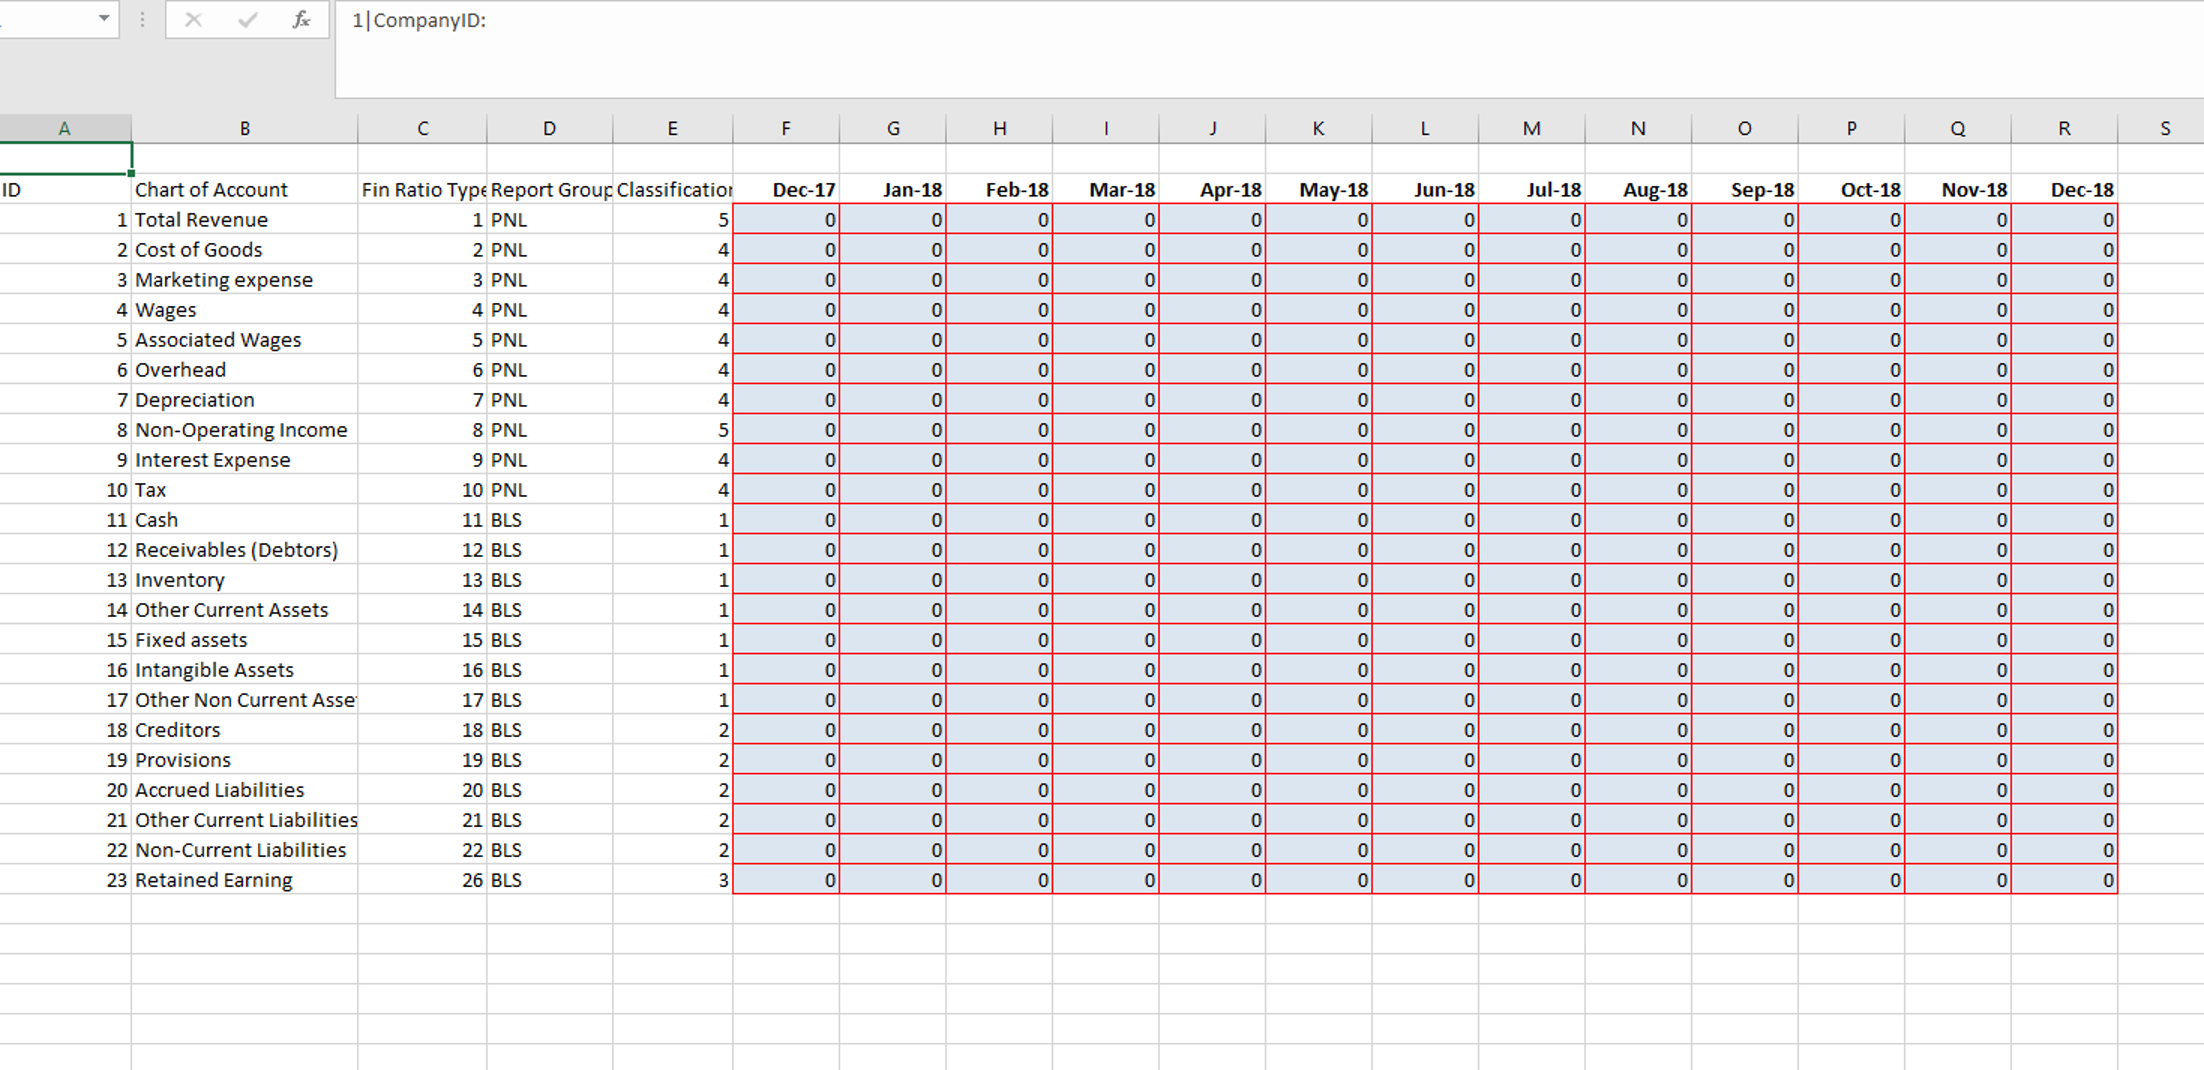
5. At this point, you will have the excel template which you can fill out with the client’s data accordingly.

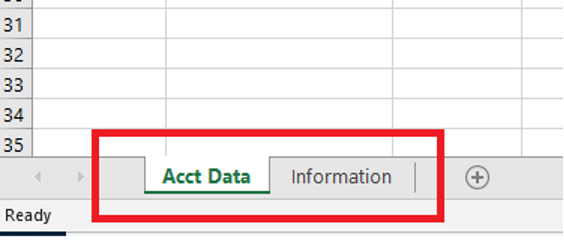
- You are able to add additional fields to this excel sheet, but please ensure that you leave the existing fields, and add to the bottom of the sheet. If you wish to add additional fields, you will need to map these additional fields with the correct “Fin Ratio Type”, “Report group” and “Classification”. The sheet will export with 2 tabs, the 2nd being an Information tab which contains the key to these fields.

6. Once you have filled in the client financial information, you can either use the “Import Data” prompt on the page you downloaded the spreadsheet from to import the spreadsheet, or follow the steps 1 – 3 to get back to the import page, and follow the import data prompt on this page to import the spreadsheet back into the system.
- It is recommended to access the Virtual CFO pro module once the data is imported so that you can ensure that it has entered the system correctly.